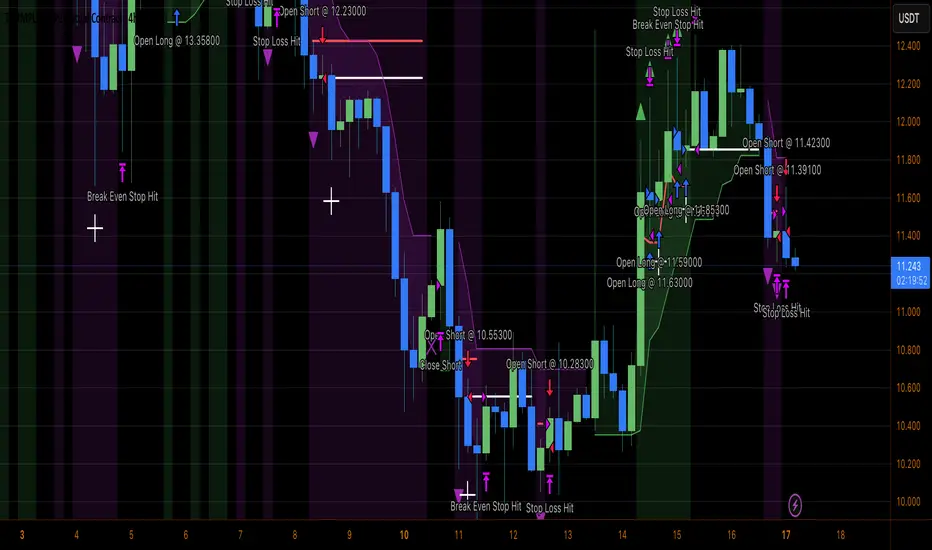
GZ Indicator✍️ Description: 
GZ Indicator is an advanced indicator that automatically detects Golden Zones, optimal market entry zones based on the latest significant pivots. The system uses Fibonacci extensions to project precise price targets, while providing a dynamic, visual stop-loss.
 Main features: 
- Pivot Detection: Automatic identification of significant pivots (high/low).
- Optimal Entry Zones (OTE): Automatically calculates ideal entry zones based on Fibonacci retracements.
- Precise Targets: Displays price targets with Fibonacci extensions.
- Dynamic Stop-Loss: Visual stop-loss zone adjusted to market conditions.
- RSI and MACD display: Add an RSI and MACD chart to facilitate trend analysis and confirm your entries.
- Intelligent refresh: Automatic deletion of the active zone as soon as the stop-loss is reached.
 🔥 Key features: 
Automatic detection of significant pivots (highs and lows)
Dynamic calculation of the OTE (Optimal Trade Entry) zone on retracements 0.618 - 0. 705
Clear display of price targets based on extensions
Intelligent updating: old zones are retained for historical analysis
Automatic deletion of current zone if Stop-Loss is reached
Contextual RSI and MACD chart for improved trend analysis
Code optimized for minimum recalculations, fluid even on fast time units.
 ⚡ How to use it: 
Spot the appearance of a Golden Zone.
Enter a position in the zone with RSI/MACD or price action confirmation.
Use the targets displayed to set your progressive Take-Profits.
Respect the Stop-Loss zone automatically drawn.
 🛠️ Available parameters: 
Activate/deactivate RSI/MACD chart
Choose number of pivots for detection
Display old targets
 [⚠️ Disclaimer: 
This indicator is a decision-making tool. It is not intended to be used as financial advice. Please always perform your own analysis and manage your risks properly.
 🔥 Bon trading ! 🚀
"stop loss"に関するスクリプトを検索
ICT Swiftedge# ICT SwiftEdge: Advanced Market Structure Trading System
**Overview**  
ICT SwiftEdge is a powerful trading system built upon the foundation of ICTProTools' ICT Breakers, licensed under the Mozilla Public License 2.0 (mozilla.org). This script has been significantly enhanced by   to combine market structure analysis with modern technical indicators and a sleek, AI-inspired statistics dashboard. The goal is to provide traders with a comprehensive tool for identifying high-probability trade setups, managing exits, and tracking performance in a visually intuitive way.
**Credits**  
This script is a derivative work based on the original "ICT Breakers" by ICTProTools, used with permission under the Mozilla Public License 2.0. Significant enhancements, including RSI-MA signals, trend filtering, dynamic timeframe adjustments, dual exit strategies, and an AI-style statistics dashboard, were developed by  . We express our gratitude to ICTProTools for their foundational work in market structure analysis.
**What It Does**  
ICT SwiftEdge integrates multiple trading concepts to help traders identify and manage trades based on market structure and momentum:
- **Market Structure Analysis**: Identifies Break of Structure (BOS) and Market Structure Shift (MSS) patterns, which signal potential trend continuations or reversals. BOS indicates a continuation of the current trend, while MSS highlights a shift in market direction, providing key entry points.
- **RSI-MA Signals**: Generates "BUY" and "SELL" signals when BOS or MSS patterns align with the Relative Strength Index (RSI) smoothed by a Moving Average (RSI-MA). Signals are filtered to occur only when RSI-MA is above 50 (for buys) or below 50 (for sells), ensuring momentum supports the trade direction.
- **Trend Filtering**: Prevents multiple signals in the same trend, ensuring only one buy or sell signal per trend direction, reducing noise and improving trade clarity.
- **Dynamic Timeframe Adjustment**: Automatically adjusts pivot points, RSI, and MA parameters based on the selected chart timeframe (1M to 1D), optimizing performance across different market conditions.
- **Flexible Exit Strategies**: Offers two user-selectable exit methods:
  - **Trailing Stop-Loss (TSL)**: Exits trades when price moves against the position by a user-defined distance (in points), locking in profits or limiting losses.
  - **RSI-MA Exit**: Exits trades when RSI-MA crosses the 50 level, signaling a potential loss of momentum.
  - Users can enable either or both strategies, providing flexibility to adapt to different trading styles.
- **AI-Style Statistics Dashboard**: Displays real-time trade performance metrics in a futuristic, neon-colored interface, including total trades, wins, losses, win/loss ratio, and win percentage. This helps traders evaluate the system's effectiveness without external tools.
**Why This Combination?**  
The integration of these components creates a synergistic trading system:
- **BOS/MSS and RSI-MA**: Combining market structure breaks with RSI-MA ensures entries are based on both price action (structure) and momentum (RSI-MA), increasing the likelihood of high-probability trades.
- **Trend Filtering**: By limiting signals to one per trend, the system avoids overtrading and focuses on significant market moves.
- **Dynamic Adjustments**: Timeframe-specific parameters make the system versatile, suitable for scalping (1M, 5M) or swing trading (4H, 1D).
- **Dual Exit Strategies**: TSL protects profits during trending markets, while RSI-MA exits are ideal for range-bound or reversing markets, catering to diverse market conditions.
- **Statistics Dashboard**: Provides immediate feedback on trade performance, enabling data-driven decision-making without manual tracking.
This combination balances technical precision with user-friendly visuals, making it accessible to both novice and experienced traders.
**How to Use**  
1. **Add to Chart**: Apply the script to any TradingView chart.
2. **Configure Settings**:
   - **Chart Timeframe**: Select your chart's timeframe (1M to 1D) to optimize parameters.
   - **Structure Timeframe**: Choose a timeframe for market structure analysis (leave blank for chart timeframe).
   - **Exit Strategy**: Enable Trailing Stop-Loss (`useTslExit`), RSI-MA Exit (`useRsiMaExit`), or both. Adjust `tslPoints` for TSL distance.
   - **Show Signals/Labels**: Toggle `showSignals` and `showExit` to display "BUY", "SELL", and "EXIT" labels.
   - **Dashboard**: Enable `showDashboard` to view trade statistics. Customize colors with `dashboardBgColor` and `dashboardTextColor`.
3. **Trading**:
   - Look for "BUY" or "SELL" labels to enter trades when BOS/MSS aligns with RSI-MA.
   - Exit trades at "EXIT" labels based on your chosen strategy.
   - Monitor the statistics dashboard to track performance (total trades, win/loss ratio, win percentage).
4. **Alerts**: Set up alerts for BOS, MSS, buy, sell, or exit signals using the provided alert conditions.
**License**  
This script is licensed under the Mozilla Public License 2.0 (mozilla.org). The source code is available for review and modification under the terms of this license.
**Compliance with TradingView House Rules**  
This publication adheres to TradingView's House Rules and Scripts Publication Rules. It provides a clear, self-contained description of the script's functionality, credits the original author (ICTProTools), and explains the rationale for combining indicators. The script contains no promotional content, offensive language, or proprietary restrictions beyond MPL 2.0.
**Note**  
Trading involves risk, and past performance is not indicative of future results. Always backtest and validate the system on your preferred markets and timeframes before live trading.
Enjoy trading with ICT SwiftEdge, and let data-driven insights guide your decisions!
Trend Zone Moving Averages📈 Trend Zone Moving Averages 
The Trend Zone Moving Averages indicator helps traders quickly identify market trends using the 50SMA, 100SMA, and 200SMA. With dynamic background colors, customizable settings, and real-time alerts, this tool provides a clear view of bullish, bearish, and extreme trend conditions.
🔹 Features:
Trend Zones with Dynamic Background Colors
Green → Bullish Trend (50SMA > 100SMA > 200SMA, price above 50SMA)
Red → Bearish Trend (50SMA < 100SMA < 200SMA, price below 50SMA)
Yellow → Neutral Trend (Mixed signals)
Dark Green → Extreme Bullish (Price above all three SMAs)
Dark Red → Extreme Bearish (Price below all three SMAs)
 Customizable Moving Averages
 
Toggle 50SMA, 100SMA, and 200SMA on/off from the settings.
Perfect for traders who prefer a cleaner chart.
  Real-Time Trend Alerts 
Get instant notifications when the trend changes:
🟢 Bullish Zone Alert – When price enters a bullish trend.
🔴 Bearish Zone Alert – When price enters a bearish trend.
🟡 Neutral Zone Alert – When trend shifts to neutral.
🌟 Extreme Bullish Alert – When price moves above all SMAs.
⚠️ Extreme Bearish Alert – When price drops below all SMAs.
✅ Perfect for Any Market
Works on stocks, forex, crypto, and commodities.
Adaptable for day traders, swing traders, and investors.
⚙️ How to Use: Trend Zone Moving Averages Strategy
This strategy helps traders identify and trade with the trend using the Trend Zone Moving Averages indicator. It works across stocks, forex, crypto, and commodities.
🟢 Bullish Trend Strategy (Green Background)
Objective: Look for buying opportunities when the market is in an uptrend.
Entry Conditions:
✅ Background is Green (Bullish Zone).
✅ Price is above the 50SMA (confirming strength).
✅ Price pulls back to the 50SMA and bounces OR breaks above a key resistance level.
Stop Loss:
🔹 Place below the most recent swing low or just under the 50SMA.
Take Profit:
🔹 First target at the next resistance level or recent swing high.
🔹 Second target if price continues higher—trail stops to lock in profits.
🔴 Bearish Trend Strategy (Red Background)
Objective: Look for shorting opportunities when the market is in a downtrend.
Entry Conditions:
✅ Background is Red (Bearish Zone).
✅ Price is below the 50SMA (confirming weakness).
✅ Price pulls back to the 50SMA and rejects OR breaks below a key support level.
Stop Loss:
🔹 Place above the most recent swing high or just above the 50SMA.
Take Profit:
🔹 First target at the next support level or recent swing low.
🔹 Second target if price keeps falling—trail stops to secure profits.
🌟 Extreme Trend Strategy (Dark Green / Dark Red Background)
Objective: Trade with momentum when the market is in a strong trend.
Entry Conditions:
✅ Dark Green Background → Extreme Bullish: Price is above all three SMAs (strong uptrend).
✅ Dark Red Background → Extreme Bearish: Price is below all three SMAs (strong downtrend).
Trade Execution:
🔹 For longs (Dark Green): Look for breakout entries above resistance or pullbacks to the 50SMA.
🔹 For shorts (Dark Red): Look for breakdown entries below support or rejections at the 50SMA.
Risk Management:
🔹 Use tighter stop losses and trail profits aggressively to maximize gains.
🟡 Neutral Trend Strategy (Yellow Background)
Objective: Avoid trading or wait for a breakout.
What to Do:
🔹 Avoid trading in this zone—price is indecisive.
🔹 Wait for confirmation (background turns green/red) before taking a trade.
🔹 Use alerts to notify you when the trend resumes.
📌 Final Tips
Use this strategy with price action for extra confirmation.
Combine with support/resistance levels to improve accuracy.
Set alerts for trend changes so you never miss an opportunity.
Enjoy!
MangAlgo X-V61. Overview & Purpose
The MangAlgo X-V6 script is a multi-component indicator designed to generate buy and sell signals on TradingView charts by combining several technical analysis techniques. It is tailored for various trading styles – including Scalping, Day Trading, and the custom MangAlgo approach – by automatically adjusting parameters based on the selected preset. The primary goal of the script is to deliver more accurate signals by integrating additional filters and a robust trade management system.
⸻
2. Key Features
	•	Trading Style Presets
	•	Three preset options: Scalping, Day Trading, and MangAlgo.
	•	The selected preset automatically adjusts key parameters such as Moving Average (MA) lengths, additional MA filters, and other settings to suit the trading style.
	•	SL/TP Settings (Stop Loss / Take Profit)
	•	Adjustable ATR multiplier for calculating the stop loss (SL).
	•	Multi-level TP (up to 5 levels) based on a configurable risk-reward ratio.
	•	Multiple Moving Average Types
	•	Supports various MA types: SMA, EMA, WMA, or VWMA (default is based on conditions).
	•	Two sets of MAs:
	•	Fast and Slow MAs for detecting crossovers as primary signals.
	•	Additional MA Filters (three additional MAs) used as further confirmation.
	•	Higher Timeframe Filter (HTF)
	•	Incorporates a moving average from a higher timeframe to provide broader trend context.
	•	The HTF MA is smoothed using SMA to ensure a stable trend indication.
	•	SuperTrend Indicator
	•	Calculates the SuperTrend level using ATR and a configurable multiplier (“Magic Number Factor”).
	•	Displays a dynamic trend line that changes color: green for an uptrend and red for a downtrend.
	•	Momentum & Candle Size Filters
	•	The momentum filter measures price strength using a momentum function over a set period.
	•	Optional candle size filtering allows you to disregard signals based on minimum and maximum candle sizes to reduce market noise.
	•	Session Filters
	•	Optionally filter signals based on trading sessions (New York, London, Tokyo, Sydney) to avoid low-liquidity periods.
	•	Directional Movement Index (DI)
	•	Computes DI+ and DI– using a smoothed True Range.
	•	Acts as an additional filter: a buy signal is valid if DI+ is greater than DI–, and vice versa for sell signals.
	•	Trade Signal Execution & Management
	•	Entry Signals:
	•	Buy: Triggered when the fast MA crosses above the slow MA, supported by SuperTrend, HTF MA, additional MAs, momentum, and DI confirmation (DI+ > DI–).
	•	Sell: Triggered when the fast MA crosses below the slow MA with corresponding filter confirmations (DI– > DI+).
	•	SL and TP Setup:
	•	The stop loss is computed using ATR and adjusted with a trailing SL as take profit levels are reached.
	•	TP levels (up to 5) are calculated based on the initial risk and a configurable risk-reward ratio.
	•	Visual Signal & Trade Outcome Display:
	•	Displays “𝗕𝗨𝗬” and “𝗦𝗘𝗟𝗟” labels on the chart when signals are active.
	•	Additional labels indicate SL and TP levels and whether the trade outcome was a win or loss once the SL is hit.
	•	Logging & Trade Statistics (Optional)
	•	Internal logging records trade details for each confirmed candle, helping you review strategy performance.
	•	An optional table display shows a summary of trade counts, win/loss results, and win rate percentages.
	•	Custom Candle Plotting
	•	Instead of using the standard barcolor(), the script uses plotcandle() to color the candles based on the active trade status:
	•	Green: Indicates an active buy position.
	•	Blue: Indicates an active sell position.
	•	Default colors: When no trade is active.
⸻
3. How It Works & Component Interaction
	1.	Preset Trading Style Selection:
	•	Users choose a trading style preset via the input, which sets the values for key parameters such as the type and length of MAs, additional filters, and more.
	2.	Core Technical Calculations:
	•	ATR Calculation: Used for range detection and setting the stop loss.
	•	Moving Averages: Computed through a custom function (f_ma()) based on the chosen MA type.
	•	Range Detection: The script identifies price ranges by comparing the price to the MA, visualizing the range with boxes and lines.
	3.	Trend Filtering & Signal Confirmation:
	•	SuperTrend: Computed using ATR and a multiplier to dynamically generate support/resistance levels.
	•	Higher Timeframe MA: Provides macro trend context by analyzing a higher timeframe’s data.
	•	Additional MA & Momentum Filters: Ensure that the price movement is not mere noise, but confirmed by extra layers of filtering.
	•	DI (Directional Movement): Validates entry signals by ensuring that the directional momentum (DI+) dominates for buys and DI– for sells.
	4.	Signal Execution & Trade Management:
	•	When all conditions are met (including session filtering and non-range conditions), a buy or sell signal is activated.
	•	Upon signal activation, a trade is initiated with a calculated SL and multiple TP levels based on risk parameters.
	•	As the price reaches a TP level, the script adjusts the stop loss (trailing SL) to lock in gains.
	•	Trade outcomes (win or lose) are visually labeled on the chart after the SL is hit.
	5.	Visualization & Logging:
	•	Trading signals and SL/TP levels are plotted on the chart.
	•	Custom candle plotting highlights active trades by altering candle colors.
	•	Trade logging captures detailed information for each candle, which can be used for performance evaluation.
⸻
4. How to Use the Script
	•	Initial Setup:
	•	Select your preferred trading style preset (e.g., Scalping, Day Trading, or MangAlgo).
	•	Adjust additional input parameters if needed, such as the ATR multiplier, number of TPs, or session filters.
	•	Interpreting Signals:
	•	Look for “𝗕𝗨𝗬” and “𝗦𝗘𝗟𝗟” labels on the chart as indicators of entry points.
	•	Use the plotted SL and TP levels as guides for risk management.
	•	Utilizing Additional Filters:
	•	Optionally enable the candle size filter and session filters to reduce false signals.
	•	Regularly monitor the chart and remember that this indicator is a tool that combines multiple technical methods for better signal accuracy.
	•	Trade Management:
	•	Use the provided trade outcome labels and logging information to assess and refine your strategy over time.
	•	If activated, review the trade summary table to analyze overall performance statistics.
⸻
5. Risk Disclaimer
Trading involves significant risk and may not be suitable for all investors.
The MangAlgo X-V6 script is provided for educational and informational purposes only. Past performance is not indicative of future results. Trading decisions based on this script are at the sole discretion of the user, and the creator or distributor of the script is not responsible for any financial losses incurred. Always perform your own analysis, use proper risk management techniques, and consult with a professional financial advisor if necessary.
SMA Crossover with RSI ConfirmationThis is a sniper entry indicator that provides Buy and Sell signals using other Indicators to give the best possible Entries
Moving Average Crossovers:
The indicator uses two moving averages: a short-term SMA (Simple Moving Average) and a long-term SMA.
When the short-term SMA crosses above the long-term SMA, it generates a buy signal (indicating potential upward momentum).
When the short-term SMA crosses below the long-term SMA, it generates a sell signal (indicating potential downward momentum).
RSI Confirmation:
The indicator incorporates RSI (Relative Strength Index) to confirm the buy and sell signals generated by the moving average crossovers.
RSI is used to gauge the overbought and oversold conditions of the market.
A buy signal is confirmed if RSI is below a specified overbought level, indicating potential buying opportunity.
A sell signal is confirmed if RSI is above a specified oversold level, indicating potential selling opportunity.
Dynamic Take Profit and Stop Loss:
The indicator calculates dynamic take profit and stop loss levels based on the Average True Range (ATR).
ATR is used to gauge market volatility, and the take profit and stop loss levels are adjusted accordingly.
This feature helps traders to manage their risk effectively by setting appropriate profit targets and stop loss levels.
Combining the information provided by these, the indicator will provide an entry point with a provided take profit and stop loss. The indicator can be applied to different asset classes. Risk management must be applied when using this indicator as it is not 100% guaranteed to be profitable.
Aggressive Strategy for High IV Market### Strategic background
In a volatile high IV market, prices are volatile and market expectations of future uncertainty are high. This environment provides opportunities for aggressive trading strategies, but also comes with a high level of risk. In pursuit of a high Sharpe ratio (i.e., risk-adjusted return), we need to design a strategy that captures the benefits of market volatility while effectively controlling risk. Based on daily line cycles, I choose a combination of trend tracking and volatility filtering for highly volatile assets such as stocks, futures or cryptocurrencies.
---
### Strategy framework
#### Data
- Use daily data, including opening, closing, high and low prices.
- Suitable for highly volatile markets such as technology stocks, cryptocurrencies or volatile index futures.
#### Core indicators
1. ** Trend Indicators ** :
Fast Exponential Moving Average (EMA_fast) : 10-day EMA, used to capture short-term trends.
- Slow Exponential Moving Average (EMA_slow) : 30-day EMA, used to determine the long-term trend.
2. ** Volatility Indicators ** :
Average true Volatility (ATR) : 14-day ATR, used to measure market volatility.
- ATR mean (ATR_mean) : A simple moving average of the 20-day ATR that serves as a volatility benchmark.
- ATR standard deviation (ATR_std) : The standard deviation of the 20-day ATR, which is used to judge extreme changes in volatility.
#### Trading logic
The strategy is based on a trend following approach of double moving averages and filters volatility through ATR indicators, ensuring that trading only in a high-volatility environment is in line with aggressive and high sharpe ratio goals.
---
### Entry and exit conditions
#### Admission conditions
- ** Multiple entry ** :
- EMA_fast Crosses EMA_slow (gold cross), indicating that the short-term trend is turning upward.
-ATR > ATR_mean + 1 * ATR_std indicates that the current volatility is above average and the market is in a state of high volatility.
- ** Short Entry ** :
- EMA_fast Crosses EMA_slow (dead cross) downward, indicating that the short-term trend turns downward.
-ATR > ATR_mean + 1 * ATR_std, confirming high volatility.
#### Appearance conditions
- ** Long show ** :
- EMA_fast Enters the EMA_slow (dead cross) downward, and the trend reverses.
- or ATR < ATR_mean-1 * ATR_std, volatility decreases significantly and the market calms down.
- ** Bear out ** :
- EMA_fast Crosses the EMA_slow (gold cross) on the top, and the trend reverses.
- or ATR < ATR_mean-1 * ATR_std, the volatility is reduced.
---
### Risk management
To control the high risk associated with aggressive strategies, set up the following mechanisms:
1. ** Stop loss ** :
- Long: Entry price - 2 * ATR.
- Short: Entry price + 2 * ATR.
- Dynamic stop loss based on ATR can adapt to market volatility changes.
2. ** Stop profit ** :
- Fixed profit target can be selected (e.g. entry price ± 4 * ATR).
- Or use trailing stop losses to lock in profits following price movements.
3. ** Location Management ** :
- Reduce positions appropriately in times of high volatility, such as dynamically adjusting position size according to ATR, ensuring that the risk of a single trade does not exceed 1%-2% of the account capital.
---
### Strategy features
- ** Aggressiveness ** : By trading only in a high ATR environment, the strategy takes full advantage of market volatility and pursues greater returns.
- ** High Sharpe ratio potential ** : Trend tracking combined with volatility filtering to avoid ineffective trades during periods of low volatility and improve the ratio of return to risk.
- ** Daily line Cycle ** : Based on daily line data, suitable for traders who operate frequently but are not too complex.
---
### Implementation steps
1. ** Data Preparation ** :
- Get the daily data of the target asset.
- Calculate EMA_fast (10 days), EMA_slow (30 days), ATR (14 days), ATR_mean (20 days), and ATR_std (20 days).
2. ** Signal generation ** :
- Check EMA cross signals and ATR conditions daily to generate long/short signals.
3. ** Execute trades ** :
- Enter according to the signal, set stop loss and profit.
- Monitor exit conditions and close positions in time.
4. ** Backtest and Optimization ** :
- Use historical data to backtest strategies to evaluate Sharpe ratios, maximum retracements, and win rates.
- Optimize parameters such as EMA period and ATR threshold to improve policy performance.
---
### Precautions
- ** Trading costs ** : Highly volatile markets may result in frequent trading, and the impact of fees and slippage on earnings needs to be considered.
- ** Risk Control ** : Aggressive strategies may face large retracements and need to strictly implement stop losses.
- ** Scalability ** : Additional metrics (such as volume or VIX) can be added to enhance strategy robustness, or combined with machine learning to predict trends and volatility.
---
### Summary
This is a trend following strategy based on dual moving averages and ATR, designed for volatile high IV markets. By entering into high volatility and exiting into low volatility, the strategy combines aggressive and risk-adjusted returns for traders seeking a high sharpe ratio. It is recommended to fully backtest before implementation and adjust the parameters according to the specific market.
Intraday Golden duckKey Components
Plotting DTR Levels
DTR High 1 & Low 1 are plotted with a bold green and red line (Major Levels).
DTR High 2 & Low 2 are plotted with a lighter green and red line (Minor Levels).
This visualizes potential breakout and stop-loss zones.
Defining Market Hours
The strategy runs only between:
Start Time: 9:15 AM (Market Open)
End Time: 3:00 PM (Market Close)
Trades can only occur during this period.
Avoiding Multiple Trades Per Day
A boolean variable trade_taken_today ensures that:
Only one trade is executed per day (either Buy or Sell).
It resets at the beginning of a new trading day.
Entry Conditions
A long position (Buy) is entered when:
The market is open.
The close price breaks above dtr_high_1.
No other trade has been executed yet.
A short position (Sell) is entered when:
The market is open.
The close price drops below dtr_low_1.
No other trade has been executed yet.
Stop-Loss Conditions
To protect against large losses, stop-loss levels are placed at DTR 2 levels:
For Long Trades: If price falls below dtr_high_2, the trade exits.
For Short Trades: If price rises above dtr_low_2, the trade exits.
Using Parabolic SAR for Additional Exit Signals
The Parabolic SAR (PSAR) is used to trail stop-loss:
Long Exit: If price falls below PSAR, the position is closed.
Short Exit: If price rises above PSAR, the position is closed.
Universal Exit Condition (3:00 PM)
At exactly 3:00 PM, all positions are forcefully closed, ensuring no overnight risk.
Execution Logic
If Buy Condition is met → Enter Long position.
If Sell Condition is met → Enter Short position.
If Stop-Loss or PSAR condition triggers → Exit the trade.
At 3:00 PM, close all positions.
Key Features & Benefits
✅ Intraday Only: No overnight risk.
✅ One Trade per Day: Avoids overtrading.
✅ Dynamic Levels: Adapts to market volatility.
✅ PSAR Protection: Helps reduce drawdowns.
✅ Universal Exit: Ensures systematic closing.
This strategy is designed for traders looking for a systematic, rule-based approach to intraday trading using price action and volatility expansion principles. 🚀
Fibonacci Extension Strt StrategyCore Logic and Steps: 
 
 Weekly Trend Identification:
 
Find the last significant Higher High (HH) and Lower Low (LL) or vice-versa on the Weekly timeframe.
Determine if it's an uptrend (HH followed by LL) or a downtrend (LL followed by HH).
Plot a Fibonacci Extension (or Retracement in reverse order) from the swing point determined to the other significant swing point.
 
 Weekly Retracement Levels:
 
Display horizontal lines at the 0.236, 0.382, and 0.5 Fibonacci levels from the weekly extension.
Monitor price action on these levels.
 
 Daily Confirmation:
 
When price hits the Fib levels, examine the Daily chart.
Look for a rejection wick (indicating the pull back is ending) on the identified weekly retracement levels.
Confirm that the price is indeed starting to continue in the direction of the original weekly trend.
 
 Four-Hour Entry:
 
On the 4H timeframe, plot a new Fib Extension in the opposite direction of the weekly.
If it's an uptrend, the Fib is plotted from last swing low to its swing high. If the weekly trend was bearish the Fib will be plotted from last swing high to the swing low.
Generate an entry when price breaks the high of that candle.
 
 Trade Management:
 
Entry is on the breakout of the current candle.
Stop Loss: Place the stop loss below the wick of the breakout candle.
Take Profit 1: Close 50% of the position at the 0.5 Fibonacci level. Move the stop loss to breakeven on this position.
Take Profit 2: Close another 25% of the position at the 0.236 Fib level.
Trailing Take Profit: Keep the last 25% open, using a trailing stop loss. (You'll need to define the logic for the trailing stop, e.g., trailing stop using the last high/low)
 How to Use in TradingView: 
 
 Open a TradingView Chart.
 
 Click on "Pine Editor" at the bottom.
 
 Copy and paste the corrected Pine Script code.
 
 Click "Add to Chart".
 
 The indicator should now be displayed on your chart.
Long Position with 1:3 Risk Reward and 20EMA CrossoverThe provided Pine Script code implements a strategy to identify long entry signals based on a 20-EMA crossover on a 5-minute timeframe. Once a buy signal is triggered, it calculates and plots the following:
Entry Price: The price at which the buy signal is generated.
Stop Loss: The low of the previous candle, acting as a risk management tool.
Take Profit: The price level calculated based on a 1:3 risk-reward ratio.
Key Points:
Buy Signal: A buy signal is generated when the current 5-minute candle closes above the 20-EMA.
Risk Management: The stop-loss is set below the entry candle to limit potential losses.
Profit Target: The take-profit is calculated based on a 1:3 risk-reward ratio, aiming for a potential profit three times the size of the risk.
Visualization: The script plots the entry price, stop-loss, and take-profit levels on the chart for visual clarity.
Remember:
Backtesting: It's crucial to backtest this strategy on historical data to evaluate its performance and optimize parameters.
Risk Management: Always use appropriate risk management techniques, such as stop-loss orders and position sizing, to protect your capital.
Market Conditions: Market conditions can change, and strategies that worked in the past may not perform as well in the future. Continuously monitor and adapt your strategy.
By understanding the core components of this script and applying sound risk management principles, you can effectively use it to identify potential long entry opportunities in the market.
Ask-Weighted Averages This indicator provides two price-based reference lines derived from volume dynamics within each bar. Specifically, it calculates a volume-weighted average price using only the portion of trading volume that occurred on the "ask" side, implying more aggressive buying activity. The logic behind this approach is to highlight potential support and resistance levels where buyers have shown greater conviction.
Key Features:
Ask-Weighted Average Prices:
Instead of using the entire trade volume, the lines focus on "ask volume" (volume associated with trades occurring at or near the ask price). This helps to spotlight areas where buyers have been dominant, potentially revealing more meaningful price levels for future market behavior.
Conditional vs. Continuous Lines:
Conditional Line: This line is only plotted if the dollar volume (a rough measure of trade value) exceeds a specified threshold, ensuring that the highlighted level is backed by substantial trading activity.
Continuous Line: A second line is always displayed, providing a running ask-weighted average price reference for additional context, regardless of dollar volume.
Supports Identifying Key Price Zones:
By focusing on where more motivated buyers have been active, the indicator helps traders identify potential inflection points in price, such as areas where the market might find support on pullbacks or resistance during rallies.
Overall, this indicator serves as a specialized tool for traders interested in volume-driven price analysis. It aims to refine the understanding of where buyers are most engaged and how that might shape future price movements.
Risks Associated with Trading:
No indicator can guarantee profitable trades or accurately predict future price movements. Market conditions are inherently unpredictable, and reliance on any single tool or combination of tools carries the risk of financial loss. Traders should practice sound risk management, including the use of stop losses and position sizing, and should not trade with funds they cannot afford to lose. Ultimately, decisions should be guided by a thorough trading plan and possibly supplemented with other forms of market analysis or professional advice.
Risks and Important Considerations:
•	Not a Standalone Tool:
•	This indicator should not be used in isolation. It is essential to incorporate additional technical analysis tools, fundamental analysis, and market context when making trading decisions.
•	Relying solely on this indicator may lead to incomplete assessments of market conditions.
•	Market Volatility and False Signals:
•	Financial markets can be highly volatile, and indicators based on historical data may not accurately predict future movements.
•	The indicator may produce false signals due to sudden market changes, low liquidity, or atypical trading activity.
•	Risk Management:
•	Always employ robust risk management strategies, including setting stop-loss orders, diversifying your portfolio, and not over-leveraging positions.
•	Understand that no indicator guarantees success, and losses are a natural part of trading.
•	Emotional Discipline:
•	Avoid making impulsive decisions based on indicator signals alone.
•	Emotional trading can lead to significant financial losses; maintain discipline and adhere to a well-thought-out trading plan.
•	Continuous Learning and Adaptation:
•	Stay informed about market news, economic indicators, and global events that may impact trading conditions.
•	Continuously evaluate and adjust your trading strategies as market dynamics evolve.
•	Consultation with Professionals:
•	Consider seeking advice from financial advisors or professional traders to understand better how this indicator can fit into your overall trading strategy.
•	Professional guidance can provide personalized insights based on your financial goals and risk tolerance.
Disclaimer:
Trading financial instruments involves substantial risk and may not be suitable for all investors. Past performance is not indicative of future results. This indicator is provided for informational and educational purposes only and should not be considered investment advice. Always conduct your own research and consult with a licensed financial professional before making any trading decisions.
 
Note: The effectiveness of any technical indicator can vary based on market conditions and individual trading styles. It's crucial to test indicators thoroughly using historical data and possibly paper trading before applying them in live trading scenarios.
WhalenatorThis custom TradingView indicator combines multiple analytic techniques to help identify potential market trends, areas of support and resistance, and zones of heightened trading activity. It incorporates a SuperTrend-like line based on ATR, Keltner Channels for volatility-based price envelopes, and dynamic order blocks derived from significant volume and pivot points. Additionally, it highlights “whale” activities—periods of exceptionally large volume—along with an estimated volume profile level and approximate bid/ask volume distribution. Together, these features aim to offer traders a more comprehensive view of price structure, volatility, and institutional participation.
This custom TradingView indicator integrates multiple trading concepts into a single, visually descriptive tool. Its primary goal is to help traders identify directional bias, volatility levels, significant volume events, and potential support/resistance zones on a price chart. Below are the main components and their functionalities:
SuperTrend-Like Line (Trend Bias):
At the core of the indicator is a trend-following line inspired by the SuperTrend concept, which uses Average True Range (ATR) to adaptively set trailing stop levels. By comparing price to these levels, the line attempts to indicate when the market is in an uptrend (price above the line) or a downtrend (price below the line). The shifting levels can provide a dynamic sense of direction and help traders stay with the predominant trend until it shifts.
Keltner Channels (Volatility and Range):
Keltner Channels, based on an exponential moving average and Average True Range, form volatility-based envelopes around price. They help traders visualize whether price is extended (touching or moving outside the upper/lower band) or trading within a stable range. This can be useful in identifying low-volatility consolidations and high-volatility breakouts.
Dynamic Order Blocks (Approximations of Supply/Demand Zones):
By detecting pivot highs and lows under conditions of significant volume, the indicator approximates "order blocks." Order blocks are areas where institutional buying or selling may have occurred, potentially acting as future support or resistance zones. Although these approximations are not perfect, they offer a visual cue to areas on the chart where price might react strongly if revisited.
Volume Profile Proxy and Whale Detection:
The indicator highlights price levels associated with recent maximum volume activity, providing a rough "volume profile" reference. Such levels often become key points of price interaction.
"Whale" detection logic attempts to identify bars where exceptionally large volume occurs (beyond a defined threshold). By tracking these "whale bars," traders can infer where heavy participation—often from large traders or institutions—may influence market direction or create zones of interest.
Approximate Bid/Ask Volume and Dollar Volume Tracking:
The script estimates whether volume within each bar leans more towards the bid or the ask side, aiming to understand which participant (buyers or sellers) might have been more aggressive. Additionally, it calculates dollar volume (close price multiplied by volume) and provides an average to gauge the relative participation strength over time.
Labeling and Visual Aids:
Dynamic labels display Whale Frequency (the ratio of bars with exceptionally large volume), average dollar volume, and approximate ask/bid volume metrics. This gives traders at-a-glance insights into current market conditions, participation, and sentiment.
Strengths:
Multifaceted Analysis:
By combining trend, volatility, volume, and order block logic in one place, the indicator saves chart space and simplifies the analytical process. Traders gain a holistic view without flipping between multiple separate tools.
Adaptable to Market Conditions:
The use of ATR and Keltner Channels adapts to changing volatility conditions. The SuperTrend-like line helps keep traders aligned with the prevailing trend, avoiding constant whipsaws in choppy markets.
Volume-Based Insights:
Integrating whale detection and a crude volume profile proxy helps traders understand where large players might be interacting. This perspective can highlight critical levels that might not be evident from price action alone.
Convenient Visual Cues and Labels:
The indicator provides quick reference points and textual information about the underlying volume dynamics, making decision-making potentially faster and more informed.
Weaknesses:
Heuristic and Approximate Nature:
Many of the indicator’s features, like the "order blocks," "whale detection," and the approximate bid/ask volume, rely on heuristics and assumptions that may not always be accurate. Without actual Level II data or true volume profiles, the insights are best considered as supplementary, not definitive signals.
Lagging Components:
Indicators that rely on past data, like ATR-based trends or moving averages for Keltner Channels, inherently lag behind price. This can cause delayed signals, particularly in fast-moving markets, potentially missing some early opportunities or late in confirming market reversals.
No Guaranteed Predictive Power:
As with any technical tool, it does not forecast the future with certainty. Strong volume at a certain level or a bullish SuperTrend reading does not guarantee price will continue in that direction. Market conditions can change unexpectedly, and false signals will occur.
Complexity and Overreliance Risk:
With multiple signals combined, there’s a risk of information overload. Traders might feel compelled to rely too heavily on this one tool. Without complementary analysis (fundamentals, news, or additional technical confirmation), overreliance on the indicator could lead to misguided trades.
Conclusion:
This integrated indicator offers a comprehensive visual guide to market structure, volatility, and activity. Its strength lies in providing a multi-dimensional viewpoint in a single tool. However, traders should remain aware of its approximations, inherent lags, and the potential for conflicting signals. Sound risk management, position sizing, and the use of complementary analysis methods remain essential for trading success.
Risks Associated with Trading:
No indicator can guarantee profitable trades or accurately predict future price movements. Market conditions are inherently unpredictable, and reliance on any single tool or combination of tools carries the risk of financial loss. Traders should practice sound risk management, including the use of stop losses and position sizing, and should not trade with funds they cannot afford to lose. Ultimately, decisions should be guided by a thorough trading plan and possibly supplemented with other forms of market analysis or professional advice.
Risks and Important Considerations:
•	Not a Standalone Tool:
•	This indicator should not be used in isolation. It is essential to incorporate additional technical analysis tools, fundamental analysis, and market context when making trading decisions.
•	Relying solely on this indicator may lead to incomplete assessments of market conditions.
•	Market Volatility and False Signals:
•	Financial markets can be highly volatile, and indicators based on historical data may not accurately predict future movements.
•	The indicator may produce false signals due to sudden market changes, low liquidity, or atypical trading activity.
•	Risk Management:
•	Always employ robust risk management strategies, including setting stop-loss orders, diversifying your portfolio, and not over-leveraging positions.
•	Understand that no indicator guarantees success, and losses are a natural part of trading.
•	Emotional Discipline:
•	Avoid making impulsive decisions based on indicator signals alone.
•	Emotional trading can lead to significant financial losses; maintain discipline and adhere to a well-thought-out trading plan.
•	Continuous Learning and Adaptation:
•	Stay informed about market news, economic indicators, and global events that may impact trading conditions.
•	Continuously evaluate and adjust your trading strategies as market dynamics evolve.
•	Consultation with Professionals:
•	Consider seeking advice from financial advisors or professional traders to understand better how this indicator can fit into your overall trading strategy.
•	Professional guidance can provide personalized insights based on your financial goals and risk tolerance.
Disclaimer:
Trading financial instruments involves substantial risk and may not be suitable for all investors. Past performance is not indicative of future results. This indicator is provided for informational and educational purposes only and should not be considered investment advice. Always conduct your own research and consult with a licensed financial professional before making any trading decisions.
 
Note: The effectiveness of any technical indicator can vary based on market conditions and individual trading styles. It's crucial to test indicators thoroughly using historical data and possibly paper trading before applying them in live trading scenarios.
Fractal Trail [UAlgo]The Fractal Trail   is designed to identify and utilize Williams fractals as dynamic trailing stops. This tool serves traders by marking key fractal points on the chart and leveraging them to create adaptive stop-loss trails, enhancing risk management and trade decision-making.
Williams fractals are pivotal in identifying potential reversals and critical support/resistance levels. By plotting fractals dynamically and providing configurable options, this indicator allows for personalized adjustments based on the trader's strategy.
This script integrates both visual fractal markers and adjustable trailing stops, offering insights into market trends while catering to a wide variety of trading styles and timeframes.
  
 🔶 Key Features 
 Williams Fractals Identification:  The indicator marks Williams Fractals on the chart, which are significant highs and lows within a specified range. These fractals are crucial for identifying potential reversal points in the market.
 Dynamic Trailing Stops:  The indicator generates dynamic trailing stops based on the identified fractals. These stops adjust automatically as new fractals are formed, providing a responsive and adaptive approach to risk management.
 Fractal Range:  Users can specify the number of bars to the left and right for analyzing fractals, allowing for flexibility in identifying significant price points.
 Trail Buffer Percentage:  A percentage-based safety margin can be added between the fractal price and the trailing stop, providing additional control over risk management.
 Trail Invalidation Source:  Users can choose whether the trailing stop flips based on candle closing prices or the extreme points (high/low) of the candles.
 Alerts and Notifications:  The indicator provides alerts for when the price crosses the trailing stops, as well as when new Williams Fractals are confirmed. These alerts can be customized to fit the trader's notification preferences.
 🔶 Interpreting the Indicator 
 Fractal Markers:  The triangles above and below the bars indicate Williams Fractals. These markers help traders identify potential reversal points in the market.
  
 Trailing Stops:  The dynamic trailing stops are plotted as lines on the chart. These lines adjust based on the latest identified fractals, providing a visual representation of potential support and resistance levels.
 Fill Colors:  The optional fill colors between the trailing stops and the price action help traders quickly identify the current trend and potential pullback zones.
  
 🔶 Disclaimer 
Use with Caution: This indicator is provided for educational and informational purposes only and should not be considered as financial advice. Users should exercise caution and perform their own analysis before making trading decisions based on the indicator's signals.
Not Financial Advice: The information provided by this indicator does not constitute financial advice, and the creator (UAlgo) shall not be held responsible for any trading losses incurred as a result of using this indicator.
Backtesting Recommended: Traders are encouraged to backtest the indicator thoroughly on historical data before using it in live trading to assess its performance and suitability for their trading strategies.
Risk Management: Trading involves inherent risks, and users should implement proper risk management strategies, including but not limited to stop-loss orders and position sizing, to mitigate potential losses.
No Guarantees: The accuracy and reliability of the indicator's signals cannot be guaranteed, as they are based on historical price data and past performance may not be indicative of future results.
TCSE24TCSE24 or Trendband Cycle Special Edition is designed to help create a simple trading plan by identifying potential Entry, Exit, Target Price, and Stop Loss. I use TCSE24 as a guide for short-term swing trading! 
Please note, TCSE24 is not a directional indicator but fits better in Trend Following Strategy.
 Only work with chart that have volume by default 
 Signals for Bullish Trade 
1. Trendband Below Candlestick
 
  Filled Red with a Purple Line.
 
2. Cycle Begin
 
  Bar Color: Vivid Green.
  Green Circle Above Candlestick: Target Price.
  Green Circle Below Candlestick: Pullback Entry.
  Red Circle Below Candlestick: Stop Loss.
 
3. Breakout
 
  Bar Color: Lemon Green.
  Green Circle Below Candlestick: Pullback Entry.
  Red Circle Below Candlestick: Stop Loss.
 
4. Broken Minor Support
 
  Bar Color: Yellow.
  Price closes below the lowest low of the last 4 candles.
 
5. Volume Test
 
  Green Triangle-Up below Candlestick.
  Current bar shows 3 consecutive falling volumes.
 
6. Inside Bar
 
  Orange Triangle-Up below Candlestick.
  High and low are within the high and low of the previous candlestick.
 
7. Box Trading
 
  Purple Diamond
 
8. Cycle End
 
  Bar Color: Red.
  Red Triangle-Up below Candlestick.
 
9. Info Panel
 
  Background Green, turning Yellow after 20 bars from Cycle Begin.
  Background Red when Cycle Ends.
  Displays info such as Current Price, Target Price, Pullback Price, Stop Loss.
 
________________________________________
 Signals for Bearish Trade 
1. Trendband Above Candlestick
 
  Filled with Blue.
 
2.Short Selling Begin
 
  Bar Color: Blue.
  Blue Circle Above Candlestick: Stop Loss.
  Blue Circle Below Candlestick: Target Price.
 
3. Breakdown
 
  Blue Circle Above Candlestick: Stop Loss.
 
4. Short Selling End
 
  Bar Color: White.
  Blue Triangle-Down above Candlestick.
 
5. Info Panel
 
  Background Blue throughout the trade.
 
________________________________________
 Bullish Trade Entry Suggestions 
1. Ensure Cycle Begin is confirmed:
 
  Buy near the closing price.
  Use a Buy Stop 2 ticks higher than Cycle Begin's highest price.
  Use a Buy Limit at the pullback price.
  Wait for a signal candlestick, then Buy the next day if the price rises above the signal candlestick’s high. 
 
2. Ensure Breakout is confirmed:
 
  Buy near the closing price.
  Use a Buy Stop 2 ticks higher than Breakout’s highest price.
  Use a Buy Limit at the pullback price.
 
3. Box Trading:
 
  Buy on the third day (T3).
  Buy above the Box Trading line.
 
4. Candlestick Signal:
  Ensure the signal candlestick is confirmed:
 
  Look for Doji, Spinning Top, or Hammer patterns.
  Buy the next day if the price rises above the signal candle's high.
 
________________________________________
 Bullish Trade Exit Suggestions 
1. Target Sell
 
  Sell when the Target Price (TP) is reached or hold as long as Stop Loss isn’t hit.
  Sell if the price doesn’t move, doesn’t reach the target, or doesn’t hit the Stop Loss after 20 candles from Cycle Begin.
  Sell if the price closes below the Stop Loss.
  
2. Candlestick Signal
 
  Look for Doji, Spinning Top, or Hammer patterns.
  Sell the next day if the price drops below the signal candle's low.
 
________________________________________
 Bearish Trade Suggestions 
Ensure Short Selling Signal or Breakdown is confirmed:
 
  Sell near the closing price.
  Close the position at Target 1, Target 2, Target 3.
  Close the position if Stop Loss is hit or when Short Selling End appears.
 
________________________________________
 Any alert() function call freq 
Once_per_bar_close
 
  Cycle Begin, Inside Bar, Doji, Hammer, Spinning Top, Box Trading, Volume Test, Short Selling
 
Once_per_bar
 
  Breakout, Cycle End
 
 For educational purposes only and should not be taken as advice on how to invest your capital. Always speak with a professional financial planner or advisor before making any investment decisions.
Balthazar by Aloupay📈  BALTHAZAR BY ALOUPAY: Advanced Trading Strategy for Precision and Reliability 
 BALTHAZAR BY ALOUPAY  is a comprehensive trading strategy developed for TradingView, designed to assist traders in making informed and strategic trading decisions. By integrating multiple technical indicators, this strategy aims to identify optimal entry and exit points, manage risk effectively, and enhance overall trading performance.
🌟  Key Features 
 1. Integrated Indicator Suite 
     Exponential Moving Averages (EMAs) : Utilizes Fast (12), Medium (26), and Slow (50) EMAs to determine trend direction and strength.
     Stochastic RSI : Employs Stochastic RSI with customizable smoothing periods to assess momentum and potential reversal points.
     Average True Range (ATR) : Calculates dynamic stop loss and take profit levels based on market volatility using ATR multipliers.
     MACD Confirmation : Incorporates MACD histogram analysis to validate trade signals, enhancing the reliability of entries.
 2. Customizable Backtesting Parameters 
    Date Range Selection: Allows users to define specific backtesting periods to evaluate strategy performance under various market conditions.
    Timezone Adaptability: Ensures accurate time-based filtering in alignment with the chart's timezone settings.
 3. Advanced Risk Management 
    Dynamic Stop Loss & Take Profit: Automatically adjusts exit points using ATR multipliers to adapt to changing market volatility.
    Position Sizing: Configurable to risk a sustainable percentage of equity per trade (recommended: 5-10%) to maintain disciplined money management.
 4. Clear Trade Signals 
    Long & Short Entries: Generates actionable signals based on the convergence of EMA alignment, Stochastic RSI crossovers, and MACD confirmation.
    Automated Exits: Implements predefined take profit and stop loss levels to secure profits and limit losses without emotional interference.
 5. Visual Enhancements 
    EMA Visualization: Displays Fast, Medium, and Slow EMAs on the chart for easy trend identification.
    Stochastic RSI Indicators: Uses distinct shapes to indicate bullish and bearish momentum shifts.
    Risk Levels Display: Clearly marks take profit and stop loss levels on the chart for transparent risk-reward assessment.
🔍  Strategy Mechanics 
 Trend Identification with EMAs
    Bullish Trend: Fast EMA (12) > Medium EMA (26) > Slow EMA (50)
    Bearish Trend: Fast EMA (12) < Medium EMA (26) < Slow EMA (50)
 Momentum Confirmation with Stochastic RSI 
    Bullish Signal: %K line crosses above %D line, indicating upward momentum.
    Bearish Signal: %K line crosses below %D line, signaling downward momentum.
 Volatility-Based Risk Management with ATR 
    Stop Loss: Positioned at 1.0 ATR below (for long) or above (for short) the entry price.
    Take Profit: Positioned at 4.0 ATR above (for long) or below (for short) the entry price.
 MACD Confirmation 
    Long Trades: Executed only when the MACD histogram is positive.
    Short Trades: Executed only when the MACD histogram is negative.
💱  Recommended Forex Pairs 
While  BALTHAZAR BY ALOUPAY  has shown robust performance on the 4-hour timeframe for Gold (XAU/USD), it is also well-suited for the following highly liquid forex pairs:
    EUR/USD (Euro/US Dollar)
    GBP/USD (British Pound/US Dollar)
    USD/JPY (US Dollar/Japanese Yen)
    AUD/USD (Australian Dollar/US Dollar)
    USD/CAD (US Dollar/Canadian Dollar)
    NZD/USD (New Zealand Dollar/US Dollar)
    EUR/GBP (Euro/British Pound)
These pairs offer high liquidity and favorable trading conditions that complement the strategy's indicators and risk management features.
⚙️  Customization Options 
 Backtesting Parameters 
    Start Date: Define the beginning of the backtesting period.
    End Date: Define the end of the backtesting period.
 EMAs Configuration 
    Fast EMA Length: Default is 12.
    Medium EMA Length: Default is 26.
    Slow EMA Length: Default is 50.
    Source: Default is Close price.
 Stochastic RSI Configuration 
    %K Smoothing: Default is 5.
    %D Smoothing: Default is 4.
    RSI Length: Default is 14.
    Stochastic Length: Default is 14.
    RSI Source: Default is Close price.
 ATR Configuration 
    ATR Length: Default is 14.
    ATR Smoothing Method: Options include RMA, SMA, EMA, WMA (default: RMA).
    Stop Loss Multiplier: Default is 1.0 ATR.
    Take Profit Multiplier: Default is 4.0 ATR.
 MACD Configuration 
    MACD Fast Length: Default is 12.
    MACD Slow Length: Default is 26.
    MACD Signal Length: Default is 9.
📊  Why Choose BALTHAZAR BY ALOUPAY?
 
    Comprehensive Integration: Combines trend, momentum, and volatility indicators for a multifaceted trading approach.
    Automated Precision: Eliminates emotional decision-making with rule-based entry and exit signals.
    Robust Risk Management: Protects capital through dynamic stop loss and take profit levels tailored to market conditions.
    User-Friendly Customization: Easily adjustable settings to align with individual trading styles and risk tolerance.
    Proven Reliability: Backtested over extensive periods across various market environments to ensure consistent performance.
 Disclaimer : Trading involves significant risk of loss and is not suitable for every investor. Past performance is not indicative of future results. Always conduct your own research and consider your financial situation before engaging in trading activities.
ICT Setup 02 [TradingFinder] Breaker Blocks + Reversal Candles🔵 Introduction 
The "Breaker Block" concept, widely utilized in ICT (Inner Circle Trader) technical analysis, is a crucial tool for identifying reversal points and significant market shifts. Originating from the "Order Block" concept, Breaker Blocks help traders pinpoint support and resistance levels. These blocks are essential for understanding market trends and recognizing optimal entry and exit points.
A Breaker Block is essentially a failed Order Block that changes its role when price action breaks through it. When an Order Block fails to hold as a support or resistance level, it reverses its function, becoming a Breaker Block. 
 There are two primary types : Bullish Breaker Blocks and Bearish Breaker Blocks. These Breaker Blocks align with the prevailing market trend and indicate potential entry points after a liquidity sweep or a shift in market structure. 
Understanding and applying the Breaker Block strategy enables traders to capitalize on the behavior of institutional investors, enhancing their trading outcomes.
 Bullish Setup :
  
 Bearish Setup :
  
🔵 How to Use 
The ICT Setup 02 indicator designed to automate the identification of Bullish and Bearish Breaker Blocks. This tool enables traders to easily spot these blocks on a chart and utilize them for entering or exiting trades. Below is a breakdown of how to use this indicator in both bullish and bearish setups.
🟣 Bullish Breaker Block Setup 
A Bullish Breaker Block setup is identified in an uptrend, where it serves as a potential entry point. This setup occurs when a Bearish Order Block fails and the price moves above the high of that Order Block. In this scenario, the previously bearish Order Block turns into a Bullish Breaker Block, which now acts as a support level for the price.
To trade a Bullish Breaker Block, wait for the price to retest this newly formed support level. Confirmation of the uptrend can be achieved by analyzing lower time frames for further market structure shifts or other bullish indicators. 
A successful retest of the Bullish Breaker Block provides a high-probability entry point for a long trade, as it signals institutional support. Traders often place their stop-loss below the low of the Breaker Block zone to minimize risk.
  
🟣 Bearish Breaker Block Setup 
A Bearish Breaker Block setup, conversely, is used in a downtrend to identify potential sell opportunities. This setup forms when a Bullish Order Block fails, and the price moves below the low of that Order Block. 
Once this Order Block is broken, it reverses its role and becomes a Bearish Breaker Block, providing resistance to the price as it pushes downward. For a Bearish Breaker Block trade, wait for the price to retest this resistance level. 
A confirmation of the downtrend, such as a market structure shift on a lower time frame or additional bearish signals, strengthens the setup. The Bearish Breaker Block retest provides an opportunity to enter a short position, with a stop-loss placed just above the high of the Breaker Block zone. 
  
🔵 Settings 
 Pivot Period : This setting controls the look-back period used to identify pivot points that contribute to the detection of Order Blocks. A higher period captures longer-term pivots, while a lower period focuses on more recent price action. Adjusting this parameter allows traders to fine-tune the indicator to match their trading time frame.
 Breaker Block Validity Period : This setting defines how long a Breaker Block remains valid based on the number of bars elapsed since its formation. Increasing the validity period keeps Breaker Blocks active for a longer duration, which can be useful for higher time frame analysis.
 Mitigation Level BB : This option lets traders choose the level of the Order Block at which the price is expected to react. Options like "Proximal," "50% OB," and "Distal" adjust the zone where a reaction may occur, offering flexibility in setting up the entry and stop-loss levels.
 Breaker Block Refinement : The refinement option refines the Breaker Block zone to display a more precise range for aggressive or defensive trading approaches. The "Aggressive" mode provides a tighter range for risk-tolerant traders, while the "Defensive" mode expands the zone for those with a more conservative approach.
🔵 Conclusion 
The Breaker Block indicator provides traders with a sophisticated tool for identifying key reversal zones in the market. By leveraging Breaker Blocks, traders can gain insights into institutional order flow and predict critical support and resistance levels. 
Using Breaker Blocks in conjunction with other ICT concepts, like Fair Value Gaps or liquidity sweeps, enhances the reliability of trading signals. This indicator empowers traders to make informed decisions, aligning their trades with institutional moves in the market. 
As with any trading strategy, it is crucial to incorporate proper risk management, using stop-losses and position sizing to minimize potential losses. The Breaker Block strategy, when applied with discipline and thorough analysis, serves as a powerful addition to any trader’s toolkit.
PERFECT PIVOT RANGE DR ABIRAM SIVPRASAD (PPR)PERFECT PIVOT RANGE (PPR) by Dr. Abhiram Sivprasad
The Perfect Pivot Range (PPR) indicator is designed to provide traders with a comprehensive view of key support and resistance levels based on pivot points across different timeframes. This versatile tool allows users to visualize daily, weekly, and monthly pivots along with high and low levels from previous periods, helping traders identify potential areas of price reversals or breakouts.
Features:
Multi-Timeframe Pivots:
Daily, weekly, and monthly pivot levels (Pivot Point, Support 1 & 2, Resistance 1 & 2).
Helps traders understand price levels across various timeframes, from short-term (daily) to long-term (monthly).
Previous High-Low Levels:
Displays the previous week, month, and day high-low levels to highlight key zones of historical support and resistance.
Traders can easily see areas of price action from prior periods, giving context for future price movements.
Customizable Options:
Users can choose which pivot levels and high-lows to display, allowing for flexibility based on trading preferences.
Visual settings can be toggled on and off to suit different trading strategies and timeframes.
Real-Time Data:
All pivot points and levels are dynamically calculated based on real-time price data, ensuring accurate and up-to-date information for decision-making.
How to Use:
Pivot Points: Use daily, weekly, or monthly pivot points to find potential support or resistance levels. Prices above the pivot suggest bullish sentiment, while prices below indicate bearishness.
Previous High-Low: The high-low levels from previous days, weeks, or months can serve as critical zones where price may reverse or break through, indicating potential trade entries or exits.
Confluence: When pivot points or high-low levels overlap across multiple timeframes, they become even stronger levels of support or resistance.
This indicator is suitable for all types of traders (scalpers, swing traders, and long-term investors) looking to enhance their technical analysis and make more informed trading decisions.
Here are three detailed trading strategies for using the Perfect Pivot Range (PPR) indicator for options, stocks, and commodities:
1. Options Buying Strategy with PPR Indicator
Strategy: Buying Call and Put Options Based on Pivot Breakouts
Objective: To capitalize on sharp price movements when key pivot levels are breached, leading to high returns with limited risk in options trading.
Timeframe: 15-minute to 1-hour chart for intraday option trading.
Steps:
Identify the Key Levels:
Use weekly pivots for intraday trading, as they provide more significant levels for options.
Enable the "Previous Week High-Low" to gauge support and resistance from the previous week.
Call Option Setup (Bullish Breakout):
Condition: If the price breaks above the weekly pivot point (PP) with high momentum (indicated by a strong bullish candle), it signifies potential bullishness.
Action: Buy Call Options at the breakout of the weekly pivot.
Confirmation: Check if the price is sustaining above the pivot with a minimum of 1-2 candles (depending on timeframe) and the first resistance (R1) isn’t too far away.
Target: The first resistance (R1) or previous week’s high can be your target for exiting the trade.
Stop-Loss: Set a stop-loss just below the pivot point (PP) to limit risk.
Put Option Setup (Bearish Breakdown):
Condition: If the price breaks below the weekly pivot (PP) with strong bearish momentum, it’s a signal to expect a downward move.
Action: Buy Put Options on a breakdown below the weekly pivot.
Confirmation: Ensure that the price is closing below the pivot, and check for declining volumes or bearish candles.
Target: The first support (S1) or the previous week’s low.
Stop-Loss: Place the stop-loss just above the pivot point (PP).
Example:
Let’s say the weekly pivot point (PP) is at 1500, the price breaks above and sustains at 1510. You buy a Call Option with a strike price near 1500, and the target will be the first resistance (R1) at 1530.
2. Stock Trading Strategy with PPR Indicator
Strategy: Swing Trading Using Pivot Points and Previous High-Low Levels
Objective: To capture mid-term stock price movements using pivot points and historical high-low levels for better trade entries and exits.
Timeframe: 1-day or 4-hour chart for swing trading.
Steps:
Identify the Trend:
Start by determining the overall trend of the stock using the weekly pivots. If the price is consistently above the pivot point (PP), the trend is bullish; if below, the trend is bearish.
Buy Setup (Bullish Trend Reversal):
Condition: When the stock bounces off the weekly pivot point (PP) or previous week’s low, it signals a bullish reversal.
Action: Enter a long position near the pivot or previous week’s low.
Confirmation: Look for a bullish candle pattern or increasing volumes.
Target: Set your first target at the first resistance (R1) or the previous week’s high.
Stop-Loss: Place your stop-loss just below the previous week’s low or support (S1).
Sell Setup (Bearish Trend Reversal):
Condition: When the price hits the weekly resistance (R1) or previous week’s high and starts to reverse downwards, it’s an opportunity to short-sell the stock.
Action: Enter a short position near the resistance.
Confirmation: Watch for bearish candle patterns or decreasing volume at the resistance.
Target: Your first target would be the weekly pivot point (PP), with the second target as the previous week’s low.
Stop-Loss: Set a stop-loss just above the resistance (R1).
Use Previous High-Low Levels:
The previous week’s high and low are key levels where price reversals often occur, so use them as reference points for potential entry and exit.
Example:
Stock XYZ is trading at 200. The previous week’s low is 195, and it bounces off that level. You enter a long position with a target of 210 (previous week’s high) and place a stop-loss at 193.
3. Commodity Trading Strategy with PPR Indicator
Strategy: Trend Continuation and Reversal in Commodities
Objective: To capitalize on the strong trends in commodities by using pivot points as key support and resistance levels for trend continuation and reversal.
Timeframe: 1-hour to 4-hour charts for commodities like Gold, Crude Oil, Silver, etc.
Steps:
Identify the Trend:
Use monthly pivots for long-term commodities trading since commodities often follow macroeconomic trends.
The monthly pivot point (PP) will give an idea of the long-term trend direction.
Trend Continuation Setup (Bullish Commodity):
Condition: If the price is consistently trading above the monthly pivot and pulling back towards the pivot without breaking below it, it indicates a bullish continuation.
Action: Enter a long position when the price tests the monthly pivot (PP) and starts moving up again.
Confirmation: Look for a strong bullish candle or an increase in volume to confirm the continuation.
Target: The first resistance (R1) or previous month’s high.
Stop-Loss: Place the stop-loss below the monthly pivot (PP).
Trend Reversal Setup (Bearish Commodity):
Condition: When the price reverses from the monthly resistance (R1) or previous month’s high, it’s a signal for a bearish reversal.
Action: Enter a short position at the resistance level.
Confirmation: Watch for bearish candle patterns or decreasing volumes at the resistance.
Target: Set your first target as the monthly pivot (PP) or the first support (S1).
Stop-Loss: Stop-loss should be placed just above the resistance level.
Using Previous High-Low for Swing Trades:
The previous month’s high and low are important in commodities. They often act as barriers to price movement, so traders should look for breakouts or reversals near these levels.
Example:
Gold is trading at $1800, with a monthly pivot at $1780 and the previous month’s high at $1830. If the price pulls back to $1780 and starts moving up again, you enter a long trade with a target of $1830, placing your stop-loss below $1770.
Key Points Across All Strategies:
Multiple Timeframes: Always use a combination of timeframes for confirmation. For example, a daily chart may show a bullish setup, but the weekly pivot levels can provide a larger trend context.
Volume: Volume is key in confirming the strength of price movement. Always confirm breakouts or reversals with rising or declining volume.
Risk Management: Set tight stop-loss levels just below support or above resistance to minimize risk and lock in profits at pivot points.
Each of these strategies leverages the powerful pivot and high-low levels provided by the PPR indicator to give traders clear entry, exit, and risk management points across different markets
Weighted Vstop | viResearchWeighted Vstop | viResearch
Conceptual Foundation and Innovation
The "Weighted Vstop" indicator from viResearch is a volatility-based stop-loss system that enhances the accuracy of trend-following strategies by incorporating weighted price calculations. The innovation lies in its use of a weighted closing price, combined with the Average True Range (ATR) to account for volatility. By emphasizing recent data through a weighted price, the indicator becomes more responsive to market changes, providing a dynamic tool for setting stop-losses and identifying potential trend shifts.
This weighted approach helps traders manage risk more effectively, reducing the likelihood of false signals caused by sudden market fluctuations, making it ideal for traders seeking to stay aligned with market trends.
Technical Composition and Calculation
The "Weighted Vstop" script starts by calculating a weighted closing price, assigning 90% weight to the current close and 10% weight to the previous close. This produces a smoother price series, minimizing noise. The core component, the volatility stop (Vstop), is calculated using the ATR and a user-defined multiplier. The ATR measures market volatility over a specified length, while the multiplier adjusts the Vstop's sensitivity to these changes in volatility.
Two key variables—the maximum and minimum values of the weighted closing price—are maintained throughout. When the price moves above the Vstop, an uptrend is signaled, causing the stop to adjust upward. If the price falls below the Vstop, the stop moves downward, indicating a potential downtrend. This dynamic adjustment mechanism helps traders lock in profits during trends and minimize losses during reversals.
Features and User Inputs
The "Weighted Vstop" script offers various customizable inputs for traders to fine-tune the indicator based on their strategies. Traders can adjust:
Vstop Length, which defines the period used to calculate the ATR, determining how sensitive the stop-loss levels are to volatility.
Multiplier, which modifies the ATR’s influence on the Vstop, allowing traders to widen or tighten the stop-loss levels.
Bar Color Settings, enabling traders to visually distinguish trend shifts by coloring bars according to the current trend direction. Practical Applications
The "Weighted Vstop" indicator is designed for traders seeking a dynamic method to set stop-losses and identify trends. The weighted price series helps reduce false signals during volatile conditions, while the ATR-based Vstop ensures that stop-loss levels adjust based on market volatility. This makes it particularly effective for:
Risk Management, allowing traders to adapt their strategy by tightening stops during low volatility and widening them in high-volatility environments.
Trend-Following, providing clear signals for when trends continue or reverse, helping traders stay in profitable trades longer while avoiding premature exits.
Reducing False Signals, where the weighted price calculation helps minimize the noise that could trigger unnecessary stop-losses in conventional systems. Advantages and Strategic Value
The "Weighted Vstop" script is valuable for its integration of a volatility-based stop-loss with a weighted price calculation. The ATR-based stop-loss dynamically adapts to market conditions, offering a more refined approach to risk management. Customizable Vstop length and multiplier settings allow traders to adjust the indicator based on their timeframes and trading preferences.
This adaptability makes the "Weighted Vstop" a key tool for optimizing risk management, providing accurate stop-loss levels that respond to market volatility without overreacting to short-term fluctuations.
Alerts and Visual Cues
The script includes alert conditions to notify traders of significant trend changes. A "Weighted Vstop Long" alert triggers when the weighted price moves above the Vstop, indicating a potential upward trend. Conversely, the "Weighted Vstop Short" alert signals a possible downward trend when the price falls below the Vstop. Color-coded bar plots offer clear visual cues to indicate the current trend, helping traders interpret real-time market conditions effectively.
Summary and Usage Tips
The "Weighted Vstop | viResearch" indicator provides an adaptable and powerful solution for traders who want to use volatility-based stop-losses to identify trend shifts. By integrating a weighted closing price with an ATR-based Vstop, this script helps traders remain aligned with trends while managing risk efficiently. Incorporating this tool into your trading strategy can improve your ability to capture trends and minimize losses during market reversals, offering a reliable and customizable option for traders at all levels.
Note: Backtests are based on past results and are not indicative of future performance.
Scalper Bot [SMRT Algo]The SMRT Algo Bot is a trading strategy designed for use on TradingView, enabling traders to backtest and refine their strategies with precision. This bot is built to provide key performance metrics through TradingView’s strategy tester feature, offering insights such as net profit, maximum drawdown, profit factor, win rate, and more.
 
The SMRT Algo Bot is versatile, allowing traders to execute either pro-trend or contrarian strategies, each with customizable parameters to suit individual trading styles.
 
Traders can automate the bot to their brokerage platform via webhooks and use third-party software to facilitate this.
Core Features:
 
  Backtesting Capabilities: The SMRT Algo Bot leverages TradingView’s powerful strategy tester, allowing traders to backtest their strategies over historical data. This feature is crucial for assessing the viability of a strategy before deploying it in live markets. By providing metrics such as net profit, maximum drawdown, profit factor, and win rate, traders can gain a comprehensive understanding of their strategy's performance, helping them to make informed decisions about potential adjustments or optimizations.
  Advanced Take Profit and Stop Loss Methods: The SMRT Algo Bot offers multiple methods for setting Take Profit (TP) and Stop Loss (SL) levels, providing flexibility to match different market conditions and trading strategies.
Take Profit Methods:
- Normal (Percent-based): Traders can set their TP levels as a percentage. This method adjusts the TP dynamically based on market volatility, allowing for more responsive profit-taking in volatile markets.
- Donchian Channel: Alternatively, the bot can use the Donchian Channel to set TP levels, which is particularly useful in trend-following strategies. The Donchian Channel identifies the highest high and lowest low over a specified period, providing a clear target for profit-taking when prices reach extreme levels.
Stop Loss Methods:
- Percentage-Based Stop Loss: This method allows traders to set a fixed percentage of the entry price as the stop loss. It provides a straightforward, static risk management approach that is easy to implement.
- Normal (Percent-based): Traders can set their SL levels as a percentage. This method adjusts the SL dynamically based on market volatility, allowing for more responsive profit-taking in volatile markets.
- ATR Multiplier: Similar to the TP method, the SL can also be set using a multiple of the ATR.
  Pro-Trend and Contrarian Strategies: The SMRT Algo Bot is designed to execute either pro-trend or contrarian trading strategies, though only one can be active at any given time.
Pro-Trend Strategy: This strategy aligns with the prevailing market trend, aiming to capitalize on the continuation of current price movements. It is particularly effective in trending markets, where momentum is expected to carry the price further in the direction of the trend.
Contrarian Strategy: In contrast, the contrarian strategy seeks to exploit potential reversals or corrections, trading against the prevailing trend. This approach is more suitable in overextended markets where a pullback is anticipated. Traders can switch between these strategies based on their market outlook and trading style.
  Dashboard Display: A dashboard located in the bottom right corner of the TradingView interface provides real-time updates on the bot’s performance metrics. This includes key statistics such as net profit, drawdown, profit factor, and win rate, specific to the current instrument being tested. This immediate access to performance data allows traders to quickly assess the effectiveness of the strategy and make necessary adjustments on the fly.
 
 
Input Settings:
 
  Reverse Signals: If turned on, buy trades will be shown as sell trades, etc.
  Show Signal (Bar Color): Shows the signal bar as a green candle for buy or red candle for sell.
  RSI: Used as a filter for one of the conditions for trade. Can be turned on/off by clicking on the checkbox.
  Timeframe: Affects the timeframe of RSI filter.
  Length: Length of RSI used in measurement.
  First Cross: Whether or not to factor in the first RSI cross in the calculation.
  Buy/Sell (Above/Below): Look for trades if RSI is above or below these values.
  EMA: Used as a trend filter for one of the conditions for trade. Can be turned on/off by clicking on the checkbox.
  Timeframe: Affects the timeframe of EMA filter.
  Fast Length: Value for the fast EMA.
  Middle Length: Value for the middle EMA
  Slow Length: Value for the slow EMA.
  ADX: Used as a volatility filter for one of the conditions for trade. Can be turned on/off by clicking on the checkbox.
  Threshold: Threshold value for ADX.
  ADX Smoothing: Smoothing value for the ADX
  DI Length: DI length value for the ADX.
  Donchian Channel Length: This value affects the length value of the DC. Used in TP calculation.
  Close Trade On Opposite Signal: If true, the current trade will close if an opposite trade appears.
  RSI: If turned on, it will also use the RSI to exit the trade (overextended zones).
  Take Profit Option: Choose between normal (percentage-based) and Donchian Channel options.
  Stop Loss Option: Choose between normal (percentage-based) and Donchian Channel options.
 
 
The SMRT Algo Bot’s components are designed to work together seamlessly, creating a comprehensive trading solution. Whether using the ATR multiplier for dynamic adjustments or the Donchian Channel for trend-based targets, these methods ensure that trades are managed effectively from entry to exit. The ability to switch between pro-trend and contrarian strategies offers adaptability, enabling traders to optimize their approach based on market behavior. The real-time dashboard ties everything together, providing continuous feedback that informs strategic adjustments.
 
Unlike basic or open-source bots, which often lack the flexibility to adapt to different market conditions, the SMRT Algo Bot provides a robust and dynamic trading solution. The inclusion of multiple TP and SL methods, particularly the ATR and Donchian Channel, adds significant value by offering traders tools that can be finely tuned to both volatile and trending markets.
 
The SMRT Algo Suite, which the SMRT Algo Bot is a part of, offers a comprehensive set of tools and features that extend beyond the capabilities of standard or open-source indicators, providing significant additional value to users.
 
What you also get with the SMRT Algo Suite:
 
  Advanced Customization: Users can customize various aspects of the indicator, such as toggling the confirmation signals on or off and adjusting the parameters of the MA Filter. This customization enhances the adaptability of the tool to different trading styles and market conditions. 
  Enhanced Market Understanding: The combination of pullback logic, dynamic S/R zones, and MA filtering offers traders a nuanced understanding of market dynamics, helping them make more informed trading decisions.
  Unique Features: The specific combination of pullback logic, dynamic S/R, and multi-level TP/SL management is unique to SMRT Algo, offering features that are not readily available in standard or open-source indicators. 
  Educational and Support Resources: As with other tools in the SMRT Algo suite, this indicator comes with comprehensive educational resources and access to a supportive trading community, as well as 24/7 Discord support.
 
 
The educational resources and community support included with SMRT Algo ensure that users can maximize the indicators’ potential, offering guidance on best practices and advanced usage.
 
SMRT Algo believe that there is no magic indicator that is able to print money. Indicator toolkits provide value via their convenience, adaptability and uniqueness. Combining these items can help a trader make more educated; less messy, more planned trades and in turn hopefully help them succeed.
 
 RISK DISCLAIMER 
 
Trading involves significant risk, and most day traders lose money. All content, tools, scripts, articles, and educational materials provided by SMRT Algo are intended solely for informational and educational purposes. Past performance is not indicative of future results. Always conduct your own research and consult with a licensed financial advisor before making any trading decisions.
Monthly Day Long Strategy with VIX and Risk ManagementThis trading strategy is designed to open long positions on a specific day of the month, with the conditions for entry and exit based on the VIX index and additional risk management techniques. The strategy includes stop-loss and take-profit features to manage risk and lock in profits.
Inputs:
    Entry Day of the Month (entry_day): Specifies which day of the month to consider for initiating a trade. The default value is the 27th.
    Hold Duration (Days) (hold_duration_days): Defines how many days to hold the position after opening. The default value is 4 days.
    VIX Threshold (vix_threshold): Sets the maximum acceptable value for the VIX index to consider an entry. If the VIX is below this threshold, it signals a potential trade. The default value is 20.0.
    Stop Loss (%) (stop_loss_percentage): Determines the percentage below the entry price where the stop-loss will be triggered. The default value is 2.0%.
    Take Profit (%) (take_profit_percentage): Sets the percentage above the entry price where the take-profit will be triggered. The default value is 5.0%.
Functions:
    next_weekday(date): Adjusts the entry date to the next Monday if it falls on a weekend (Saturday or Sunday). This ensures trades do not occur on non-trading days.
Logic:
    Entry Conditions:
        Date Check: Opens a long position if the current date matches the adjusted entry date (the 27th or the next Monday if the 27th falls on a weekend).
        VIX Filter: The VIX index value must be below the specified threshold (e.g., 20.0) to consider an entry.
    Exit Conditions:
        Time-Based Exit: Closes the position after the hold duration of 4 days.
        Stop-Loss: Automatically closes the position if the price drops to a level that is a specified percentage below the entry price (e.g., 2.0%).
        Take-Profit: Closes the position if the price rises to a level that is a specified percentage above the entry price (e.g., 5.0%).
Plots:
    VIX Plot: Displays the VIX index on the chart for visual reference.
    VIX Threshold Line: A horizontal line representing the VIX threshold value.
Summary:
The strategy aims to take advantage of specific entry days while filtering trades based on VIX levels to ensure market conditions are favorable. Risk management is enhanced through stop-loss and take-profit settings, which help in controlling potential losses and securing profits. The strategy ensures trades are only made on trading days and not on weekends, adjusting automatically to the next Monday if needed.
ChatGPT kann Fehler machen. Überprüfe wichtige Informationen.
Sniper Entry using RSI confirmationThis is a sniper entry indicator that provides Buy and Sell signals using other Indicators to give the best possible Entries (note: Entries will not be 100 percent accurate and analysis should be done to support an entry)
Moving Average Crossovers:
The indicator uses two moving averages: a short-term SMA (Simple Moving Average) and a long-term SMA.
When the short-term SMA crosses above the long-term SMA, it generates a buy signal (indicating potential upward momentum).
When the short-term SMA crosses below the long-term SMA, it generates a sell signal (indicating potential downward momentum).
RSI Confirmation:
The indicator incorporates RSI (Relative Strength Index) to confirm the buy and sell signals generated by the moving average crossovers.
RSI is used to gauge the overbought and oversold conditions of the market.
A buy signal is confirmed if RSI is below a specified overbought level, indicating potential buying opportunity.
A sell signal is confirmed if RSI is above a specified oversold level, indicating potential selling opportunity.
Dynamic Take Profit and Stop Loss:
The indicator calculates dynamic take profit and stop loss levels based on the Average True Range (ATR).
ATR is used to gauge market volatility, and the take profit and stop loss levels are adjusted accordingly.
This feature helps traders to manage their risk effectively by setting appropriate profit targets and stop loss levels.
Combining the information provided by these, the indicator will provide an entry point with a provided take profit and stop loss. The indicator can be applied to different asset classes. Risk management must be applied when using this indicator as it is not 100% guaranteed to be profitable.
Goodluck!
Master Pattern [UAlgo]🔶 Description: 
"Master Pattern by UAlgo" aims to identify and visualize "Master Patterns" in price movements on financial charts, and focusing on detecting liquidity levels and sweeps. The indicator provides users with the ability to customize settings such as master pattern detection and detection flexibility, sensitivity to liquidity levels, and visualization preferences.
 🔶 What is the Master Pattern ? 
The Master Pattern is a framework built around understanding market cycles, which include three main phases: Contraction, Expansion, and Trend.
 Contraction Phase:  During this phase, the market fluctuates less and consolidates within a narrow range. Institutional trading volumes tend to be low and it is recommended to avoid trading entries during this period.
 Expansion Phase:  volatility increases and prices fluctuate greatly. Institutional traders begin to establish positions at this stage and may manipulate prices to attract retail traders to create liquidity for their own buy or sell targets.
 Trend Phase:  The final phase that completes the market cycle. Institutional traders started taking profits, causing the trend to reverse. This triggered panic among retail traders, leading to liquidations and stop-losses. This creates liquidity from which institutional traders can profit, while retail traders' positions are overvalued.
 🔶 Key Features: 
 Pattern Detection :  The indicator detects and visualizes contraction patterns in price movements, helping traders identify potential areas of price consolidation.
  
Also traders can choose between different modes (Strict, Normal, Relax) for obtaining master patterns, providing flexibility in pattern identification based on individual trading strategies and preferences.
The Value/Expansion Line : This value line is considered by institutional traders as a potential “Point of Origin” for future price movements.
 An Application Example of the Master Pattern : 
Select the Appropriate Timeframes: A significant separation between the higher timeframe (HTF) and the lower timeframe (LTF) is essential. For instance, combinations like 4H and 15M, 4H and 5M, or 1H and 1M. You can change this according to your own strategy.
Trade Based on Contraction Box, Value Line and Liquidity: When the HTF is above value, look for buying opportunities on your LTF below value. Conversely, when the HTF is below value, seek selling opportunities on your LTF above value. Sweeping liquidity in LTF is also an important parameter.
Also Value/Expansion Line can also be used as Support/Resistance zone,
  
 Liquidity Levels :  The indicator includes functionality to detect and display liquidity levels on the chart.
  
 Dashboard Display :  A customizable dashboard provides users with key information, including liquidity levels, master pattern values, and whether the current price is above or below Master Pattern's value lines.
  
Additionally, when liquidity is swept or the price rises above or falls below the value line. this information can be displayed on the dashboard.
  
 Customizable Settings:  Users can adjust parameters such as the pattern detection mode, sensitivity to liquidity levels, liquidity type (cumulative or individual for each swing), visualization preferences for master patterns, the position and font size of the dashboard.
 🔶 Disclaimer: 
 Use with Caution:  This indicator is provided for educational and informational purposes only and should not be considered as financial advice. Users should exercise caution and perform their own analysis before making trading decisions based on the indicator's signals.
 Not Financial Advice:  The information provided by this indicator does not constitute financial advice, and the creator (UAlgo) shall not be held responsible for any trading losses incurred as a result of using this indicator.
 Backtesting Recommended:  Traders are encouraged to backtest the indicator thoroughly on historical data before using it in live trading to assess its performance and suitability for their trading strategies.
 Risk Management:  Trading involves inherent risks, and users should implement proper risk management strategies, including but not limited to stop-loss orders and position sizing, to mitigate potential losses.
 No Guarantees:  The accuracy and reliability of the indicator's signals cannot be guaranteed, as they are based on historical price data and past performance may not be indicative of future results.
Smart Money Concept [TradingFinder] Major OB + FVG + Liquidity🔵 Introduction 
"Smart Money" refers to funds under the control of institutional investors, central banks, funds, market makers, and other financial entities. Ordinary people recognize investments made by those who have a deep understanding of market performance and possess information typically inaccessible to regular investors as "Smart Money". 
Consequently, when market movements often diverge from expectations, traders identify the footprints of smart money. For example, when a classic pattern forms in the market, traders take short positions. However, the market might move upward instead. They attribute this contradiction to smart money and seek to capitalize on such inconsistencies in their trades.
The "Smart Money Concept" (SMC) is one of the primary styles of technical analysis that falls under the subset of "Price Action". Price action encompasses various subcategories, with one of the most significant being "Supply and Demand", in which SMC is categorized. 
The SMC method aims to identify trading opportunities by emphasizing the impact of large traders (Smart Money) on the market, offering specific patterns, techniques, and trading strategies.
🟣 Key Terms of Smart Money Concept (SMC) 
• Market Structure (Trend)
• Change of Character (ChoCh)
• Break of Structure (BoS)
• Order Blocks (Supply and Demand)
• Imbalance (IMB)
• Inefficiency (IFC)
• Fair Value Gap (FVG)
• Liquidity
• Premium and Discount
🔵 How Does the "Smart Money Concept Indicator" Work? 
🟣 Market Structure 
    a. Accumulation
    b. Market-Up
    c. Distribution
    d. Market-Down
a)  Accumulation Phase : During the accumulation period, typically following a downtrend, smart money enters the market without significantly affecting the pricing trend.
b)  Market-Up Phase : In this phase, the price of an asset moves upward from the accumulation range and begins to rise. Usually, the buying by retail investors is the main driver of this trend, and due to positive market sentiment, it continues.
c)  Distribution Phase : The distribution phase, unlike the accumulation stage, occurs after an uptrend. In this phase, smart money attempts to exit the market without causing significant price fluctuations.
d)  Market-Down Phase : In this stage, the price of an asset moves downward from the distribution phase, initiating a prolonged downtrend. Smart money liquidates all its positions by creating selling pressure, trapping latecomer investors.
The result of these four phases in the market becomes the market trend.
  
 Types of Trends in Financial Markets :
    a. Up-Trend
    b. Down Trend
    c. Range (No Trend)
a)  Up-Trend : The market breaks consecutive highs.
b)  Down Trend : The market breaks consecutive lows.
c)  No Trend or Range : The market oscillates within a range without breaking either highs or lows.
  
  
🟣 Change of Character (ChoCh) 
The "ChoCh" or "Change of Character" pattern indicates an initial change in order flow in financial markets. This structural change occurs when a major pivot in the opposite direction of the market trend fails. It signals a potential change in the market trend and can serve as a signal for short-term or long-term trend changes in a trading symbol.
🟣 Break of Structure (BoS) 
The "BoS" or "Break of Structure" pattern indicates the continuation of the trend in financial markets. This structure forms when, in an uptrend, the price breaks its ceiling or, in a downtrend, the price breaks its floor.
  
  
🟣 Order Blocks (Supply and Demand) 
Order blocks consist of supply and demand areas where the likelihood of price reversal is higher. There are six order blocks in this indicator, categorized based on their origin and formation reasons.
a. Demand Main Zone, "ChoCh" Origin.
b. Demand Sub Zone, "ChoCh" Origin.
c. Demand All Zone, "BoS" Origin.
d. Supply Main Zone, "ChoCh" Origin.
e. Supply Sub Zone, "ChoCh" Origin.
f. Supply All Zone, "BoS" Origin.
  
  
🟣 FVG | Inefficiency | Imbalance 
These three terms are almost synonymous. They describe the presence of gaps between consecutive candle shadows. This inefficiency occurs when the market moves rapidly. Primarily, imbalances and these rapid movements stem from the entry of smart money and the imbalance between buyer and seller power. Therefore, identifying these movements is crucial for traders.
These areas are significant because prices often return to fill these gaps or even before they occur to fill price gaps.
  
🟣 Liquidity 
Liquidity zones are areas where there is a likelihood of congestion of stop-loss orders. Liquidity is considered the driving force of the entire market, and market makers may manipulate the market using these zones. However, in many cases, this does not happen because there is insufficient liquidity in some areas. 
 Types of Liquidity in Financial Markets :
    a. Trend Lines
    b. Double Tops | Double Bottoms
    c. Triple Tops | Triple Bottoms
    d. Support Lines | Resistance Lines
All four types of liquidity in this indicator are automatically identified.
  
  
🟣 Premium and Discount 
Premium and discount zones can assist traders in making better decisions. For instance, they may sell positions in expensive ranges and buy in cheaper ranges. The closer the price is to the major resistance, the more expensive it is, and the closer it is to the major support, the cheaper it is.
🔵 How to Use 
🟣 Change of Character (ChoCh) and Break of Structure (BoS) 
This indicator detects "ChoCh" and "BoS" in both Minor and Major states. You can turn on the display of these lines by referring to the last part of the settings.
  
🟣 Order Blocks (Supply and Demand) 
Order blocks are Zones where the probability of price reversal is higher. In demand Zones you can buy opportunities and in supply Zones you can check sell opportunities.
The "Refinement" feature allows you to adjust the width of the order block according to your strategy. There are two modes, "Aggressive" and "Defensive," in the "Order Block Refine". The difference between "Aggressive" and "Defensive" lies in the width of the order block. 
For risk-averse traders, the "Defensive" mode is suitable as it provides a lower loss limit and a greater reward-to-risk ratio. For risk-taking traders, the "Aggressive" mode is more appropriate. These traders prefer to enter trades at higher prices, and this mode, which has a wider order block width, is more suitable for this group of individuals.
  
  
🟣 Fair Value Gap (FVG) | Imbalance (IMB) | Inefficiency (IFC) 
In order to identify the "fair value gap" on the chart, it must be analyzed candle by candle. In this process, it is important to pay attention to candles with a large size, and a candle and a candle should be examined before that. 
Candles before and after this central candle should have long shadows and their bodies should not overlap with the central candle body. The distance between the shadows of the first and third candles is known as the FVG range.
 These areas work in two ways :
•  Supply and demand area : In this case, the price reacts to these areas and the trend is reversed.
•  Liquidity zone : In this scenario, the price "fills" the zone and then reaches the order block.
 Important note : In most cases, the FVG zone of very small width acts as a supply and demand zone, while the zone of significant width acts as a liquidity zone and absorbs price.
When the FVG filter is activated, the FVG regions are filtered based on the specified algorithm.
 FVG filter types include the following :
1. Very Aggressive Mode : In addition to the initial condition, an additional condition is considered. For bullish FVG, the maximum price of the last candle must be greater than the maximum price of the middle candle. 
Similarly, for a bearish FVG, the minimum price of the last candle must be lower than the minimum price of the middle candle. This mode removes the minimum number of FVGs.
2. Aggressive : In addition to the very aggressive condition, the size of the middle candle is also considered. The size of the center candle should not be small and therefore more FVGs are removed in this case.
3. Defensive : In addition to the conditions of the very aggressive mode, this mode also considers the size of the middle pile, which should be relatively large and make up the majority of the body. 
Also, to identify bullish FVGs, the second and third candles must be positive, while for bearish FVGs, the second and third candles must be negative. This mode filters out a significant number of FVGs and keeps only those of good quality.
4. Very Defensive : In addition to the conditions of the defensive mode, in this mode the first and third candles should not be very small-bodied doji candles. This mode filters out most FVGs and only the best quality ones remain.
  
🟣 Liquidity 
These levels are where traders intend to exit their trades. "Market makers" or smart money usually accumulate or distribute their trading positions near these levels, where many retail traders have placed their "stop loss" orders. When liquidity is collected from these losses, the price often reverses.
A "Stop hunt" is a move designed to offset liquidity generated by established stop losses. Banks often use major news events to trigger stop hunts and capture liquidity released into the market. For example, if they intend to execute heavy buy orders, they encourage others to sell through stop-hots.
Consequently, if there is liquidity in the market before reaching the order block area, the validity of that order block is higher. Conversely, if the liquidity is close to the order block, that is, the price reaches the order block before reaching the liquidity limit, the validity of that order block is lower.


🟣 Alert 
With the new alert functionality in this indicator, you won't miss any important trading signals. Alerts are activated when the price hits the last order block.
1. It is possible to set alerts for each "symbol" and "time frame". The system will automatically detect both and include them in the warning message.
2. Each alert provides the exact date and time it was triggered. This helps you measure the timeliness of the signal and evaluate its relevance.
3. Alerts include target order block price ranges. The "Proximal" level represents the initial price level strike, while the "Distal" level represents the maximum price gap in the block. These details are included in the warning message.
4. You can customize the alert name through the "Alert Name" entry.
5. Create custom messages for "long" and "short" alerts to be sent with notifications.
  
🔵 Setting 
a.  Pivot Period of Order Blocks Detector : 
Using this parameter, you can set the zigzag period that is formed based on the pivots.
b.  Order Blocks Validity Period (Bar) : 
You can set the validity period of each Order Block based on the number of candles that have passed since the origin of the Order Block.
c.  Demand Main Zone, "ChoCh" Origin : 
You can control the display or not display as well as the color of Demand Main Zone, "ChoCh" Origin.
d.  Demand Sub Zone, "ChoCh" Origin : 
You can control the display or not display as well as the color of Demand Sub Zone, "ChoCh" Origin.
e.  Demand All Zone, "BoS" Origin : 
You can control the display or not display as well as the color of Demand All Zone, "BoS" Origin.
f.  Supply Main Zone, "ChoCh" Origin : 
You can control the display or not display as well as the color of Supply Main Zone, "ChoCh" Origin.
g.  Supply Sub Zone, "ChoCh" Origin : 
You can control the display or not display as well as the color of Supply Sub Zone, "ChoCh" Origin.
h.  Supply All Zone, "BoS" Origin : 
You can control the display or not display as well as the color of Supply All Zone, "BoS" Origin.
i.  Refine Demand Main : You can choose to be refined or not and also the type of refining.
j.  Refine Demand Sub : You can choose to be refined or not and also the type of refining. 
k.  Refine Demand BoS : You can choose to be refined or not and also the type of refining.
l.  Refine Supply Main : You can choose to be refined or not and also the type of refining.
m.  Refine Supply Sub : You can choose to be refined or not and also the type of refining.
n.  Refine Supply BoS : You can choose to be refined or not and also the type of refining.
o.  Show Demand FVG : You can choose to show or not show Demand FVG.
p.  Show Supply FVG : You can choose to show or not show Supply FVG
q.  FVG Filter : You can choose whether FVG is filtered or not. Also specify the type of filter you want to use.
r.  Show Statics High Liquidity Line : Show or not show Statics High Liquidity Line.
s.  Show Statics Low Liquidity Line : Show or not show Statics Low Liquidity Line.
t.  Show Dynamics High Liquidity Line : Show or not show Dynamics High Liquidity Line. 
u.  Show Dynamics Low Liquidity Line : Show or not show Dynamics Low Liquidity Line.
v.  Statics Period Pivot : 
Using this parameter, you can set the Swing period that is formed based on Static  Liquidity Lines.
w.  Dynamics Period Pivot :  
Using this parameter, you can set the Swing period that is formed based Dynamics Liquidity Lines.
x.  Statics Liquidity Line Sensitivity : 
is a number between 0 and 0.4. Increasing this number decreases the sensitivity of the "Statics Liquidity Line Detection" function and increases the number of lines identified. The default value is 0.3.
y.  Dynamics Liquidity Line Sensitivity :
is a number between 0.4 and 1.95. Increasing this number increases the sensitivity of the "Dynamics Liquidity Line Detection" function and decreases the number of lines identified. The default value is 1.
z.  Alerts Name : You can customize the alert name using this input and set it to your desired name.
aa.  Alert Demand Main Mitigation : 
If you want to receive the alert about Demand Main 's mitigation after setting the alerts, leave this tick on. Otherwise, turn it off.
bb.  Alert Demand Sub Mitigation : 
If you want to receive the alert about Demand Sub's mitigation after setting the alerts, leave this tick on. Otherwise, turn it off.
cc.  Alert Demand BoS Mitigation : 
If you want to receive the alert about Demand BoS's mitigation after setting the alerts, leave this tick on. Otherwise, turn it off.
dd.  Alert Supply Main Mitigation :
If you want to receive the alert about Supply Main's mitigation after setting the alerts, leave this tick on. Otherwise, turn it off.
ee.  Alert Supply Sub Mitigation : 
If you want to receive the alert about Supply Sub's mitigation after setting the alerts, leave this tick on. Otherwise, turn it off.
ff.  Alert Supply BoS Mitigation : 
If you want to receive the alert about Supply BoS's mitigation after setting the alerts, leave this tick on. Otherwise, turn it off.
gg.  Message Frequency : 
This parameter, represented as a string, determines the frequency of announcements. Options include: 'All' (triggers the alert every time the function is called), 'Once Per Bar' (triggers the alert only on the first call within the bar), and 'Once Per Bar Close' (activates the alert only during the final script execution of the real-time bar upon closure). The default setting is 'Once per Bar'.
hh.  Show Alert time by Time Zone : 
The date, hour, and minute displayed in alert messages can be configured to reflect any chosen time zone. For instance, if you prefer London time, you should input 'UTC+1'. By default, this input is configured to the 'UTC' time zone.
ii. Display More Info : The 'Display More Info' option provides details regarding the price range of the order blocks (Zone Price), along with the date, hour, and minute. If you prefer not to include this information in the alert message, you should set it to 'Off'.
 You also have access to display or not to display, choose the Style and Color of all the lines below :
a. Major Bullish "BoS" Lines
b. Major Bearish "BoS" Lines
c. Minor Bullish "BoS" Lines
d. Minor Bearish "BoS" Lines
e. Major Bullish "ChoCh" Lines
f. Major Bearish "ChoCh" Lines
g. Minor Bullish "ChoCh" Lines
h. Minor Bearish "ChoCh" Lines
i. Last Major Support Line
j. Last Major Resistance Line
k. Last Minor Support Line
l. Last Minor Resistance Line
BBSR Extreme Strategy [nachodog]The Bollinger Bands Stochastic RSI Extreme Strategy is a comprehensive trading approach designed for use on the TradingView platform, employing a combination of Bollinger Bands and the Stochastic RSI to identify potential entry and exit points in the market. This strategy is converted into Pine Script version 5 and is specifically tailored as a strategy rather than a mere study, allowing traders to simulate and backtest their trades within the TradingView environment.
 Strategy Overview:
 Bollinger Bands serve as the primary tool for volatility and price level analysis. By calculating the standard deviation of price movements around a simple moving average (SMA), this strategy identifies the upper and lower bounds of price fluctuations, helping traders spot potential reversal points.
Stochastic RSI is used to gauge the momentum by comparing the closing price's position relative to its price range over a certain period. This indicator helps in determining overbought or oversold conditions, providing insights into potential bullish or bearish momentum.
 Entry Signals:
 Bullish Entry: The strategy signals a long entry when the price moves from below to above the lower Bollinger Band, coupled with a Stochastic RSI indicating an exit from oversold conditions. This suggests an uptrend initiation, prompting a buy order.
Bearish Entry: Conversely, a short entry is signaled when the price drops from above to below the upper Bollinger Band while the Stochastic RSI moves from overbought territory. This condition indicates a potential downtrend, triggering a sell order.
 Exit Criteria:
 Stop Loss: A key feature of this strategy is the inclusion of a user-defined stop loss percentage, which helps manage risk by specifying the maximum allowable loss per trade.
Bearish Exit for Long Positions: Long positions are exited either when a bearish signal is detected or when the price crosses below the lower Bollinger Band, suggesting a reversal or weakening of the bullish trend.
Bullish Exit for Short Positions: Short positions are closed upon a bullish signal or when the price crosses above the upper Bollinger Band, indicating a potential reversal or diminishing bearish momentum.
 Strategy Benefits:
 The strategy provides a structured framework for entering and exiting trades, leveraging the strengths of both Bollinger Bands and Stochastic RSI.
It includes parameters for customization, such as the stop loss percentage, allowing traders to align the strategy with their risk tolerance and trading objectives.
The ability to backtest and simulate trades on TradingView enhances its utility, offering insights into the strategy's performance under historical market conditions.
Overall, the Bollinger Bands Stochastic RSI Extreme Strategy is designed for traders who seek to capitalize on trend reversals and momentum shifts, with built-in risk management features to safeguard against significant losses.


